Exposure you can read, instead of colours you have to remember.
Every false colour tool paints your frame. This one prints the numbers on its own scale, measures in stops from middle grey rather than in IRE, lets you say which curve it is reading, and can lay a real 18% grey card into your picture to check the answer against.
Free, for good Runs on the node, live No plugin, no install No key, no account
- Twelve bands, with the number printed on each one
- Stops from middle grey, or IRE
- Nine input curves, LogC3 through to Rec.709
- An 18% grey reference laid into your own frame
- Hue-gated skin guide and per-channel clip
- A nine page manual, every setting in plain words
- Every update, for as long as it exists
One email confirms the address, and the link in it starts
the download. The .dctl and the manual, working about thirty seconds later.
Read the manual first (PDF)
— no address needed.
What it does
The same frame, and what it is actually worth.
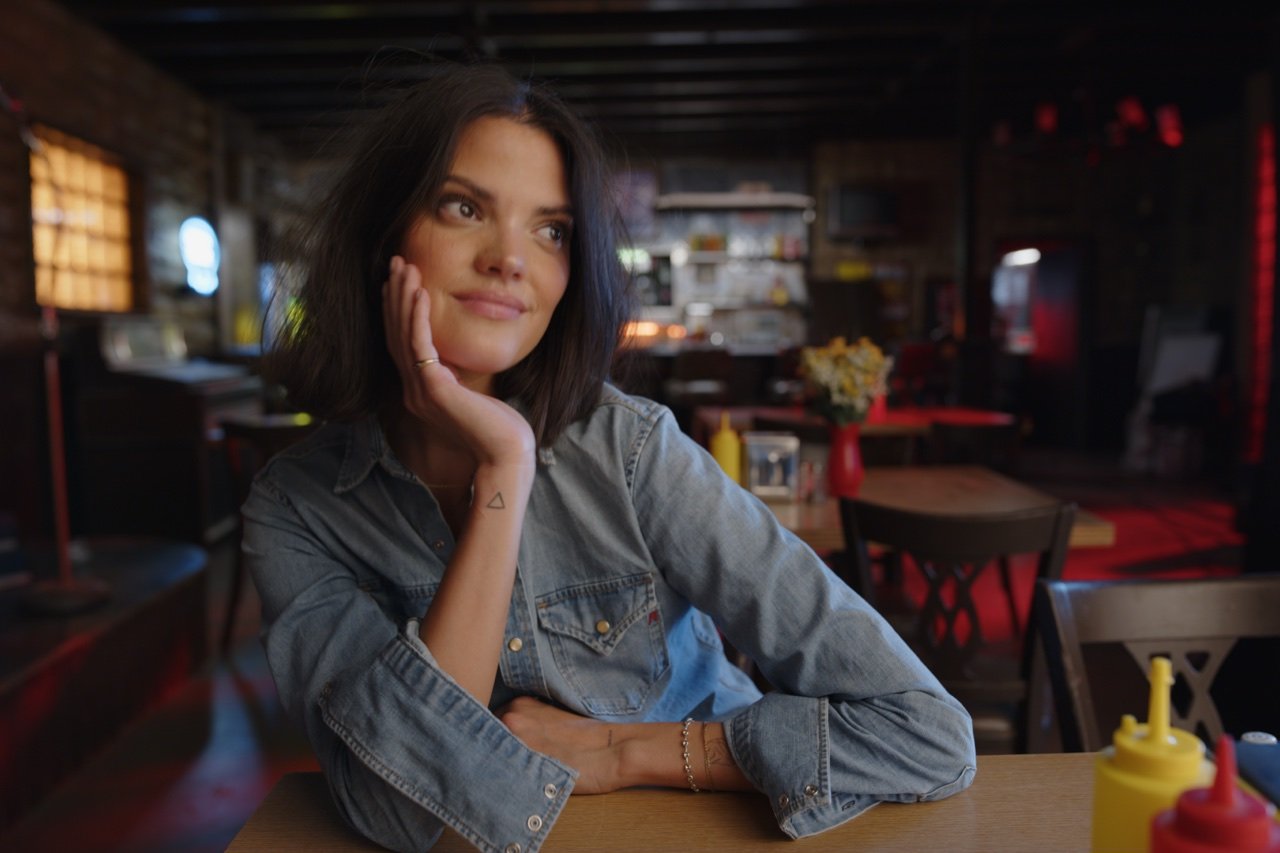
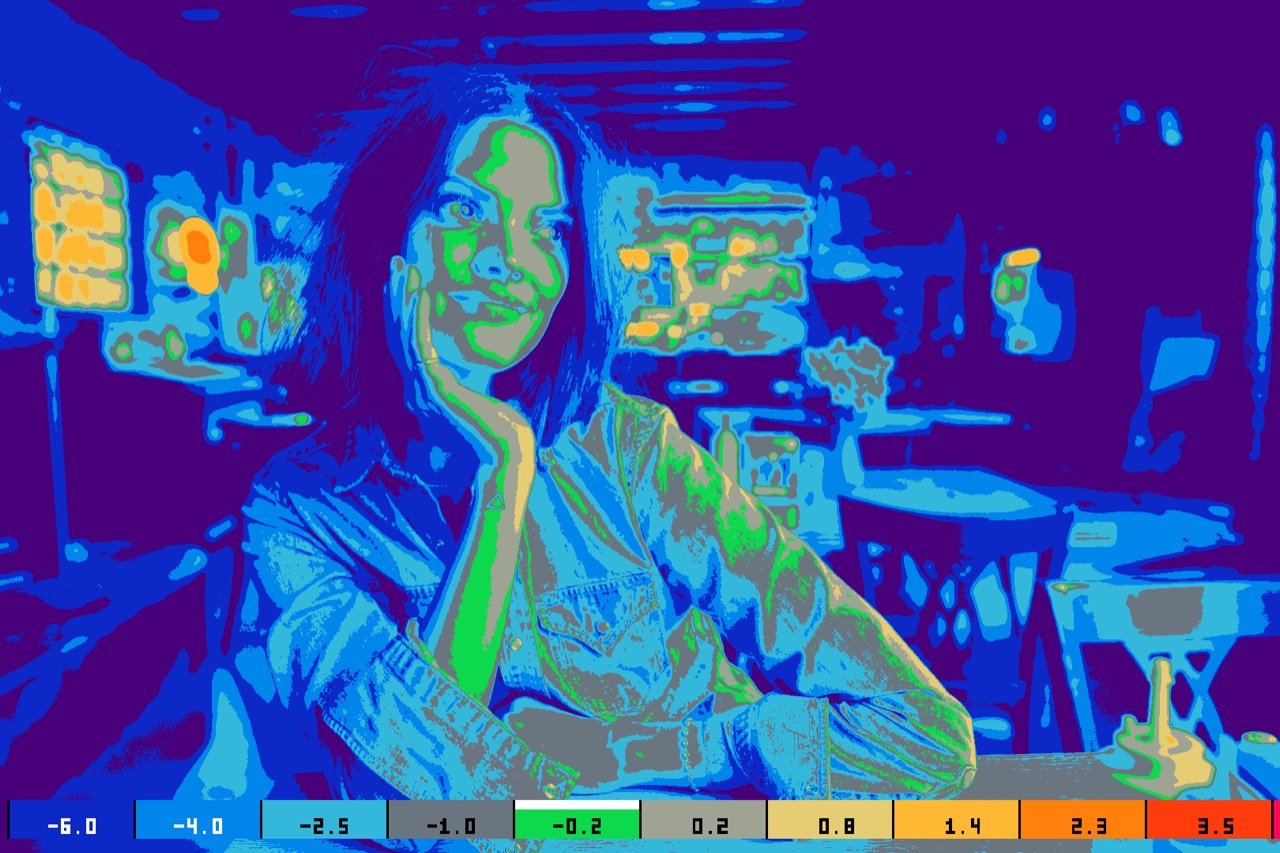
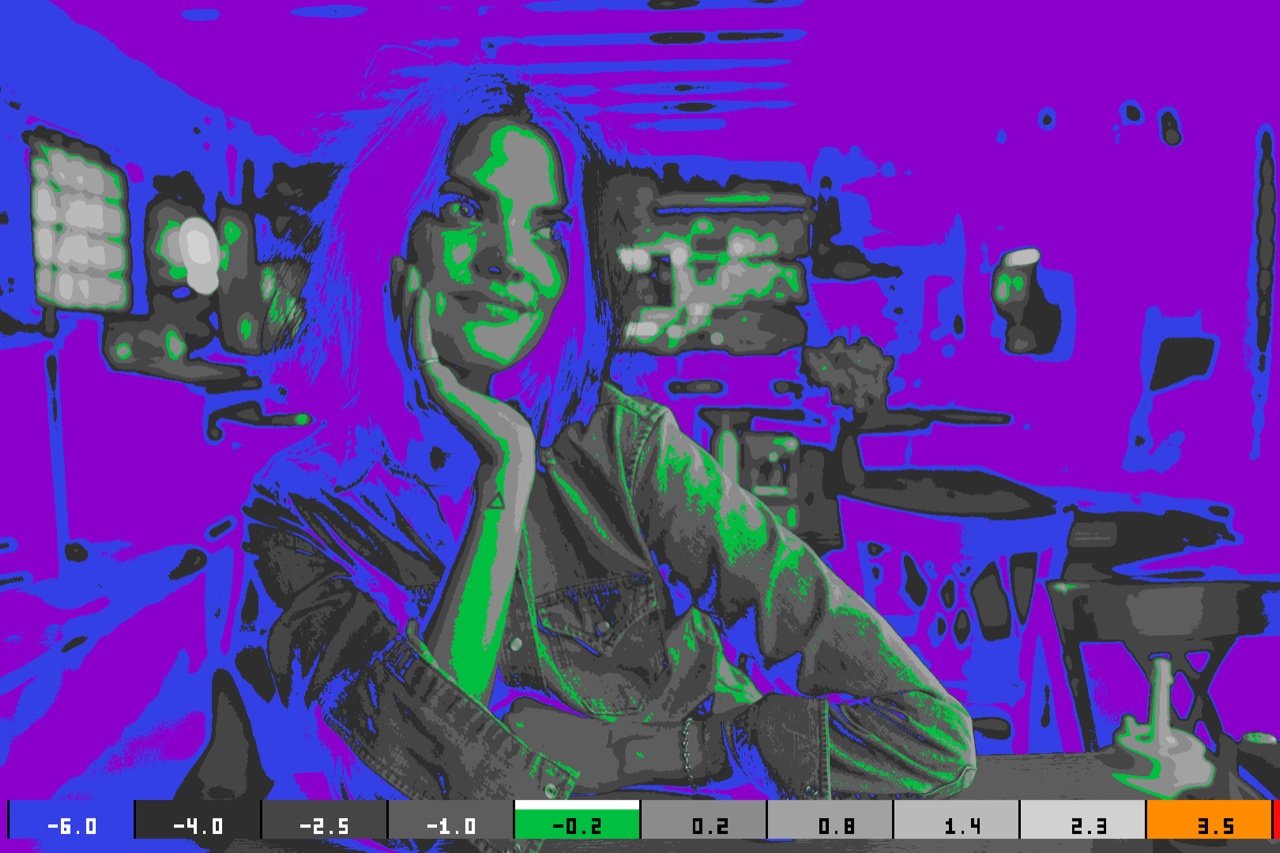
Drop it on a node and the picture becomes a map of its own exposure. Green is middle grey. Everything below it runs cool, everything above runs warm, and the strip along the bottom says in plain digits where each band starts.
The scale
The number is on the chip.
Every other false colour tool hands you a legend to memorise, or a colour chart taped to the side of the monitor. This one carries a 3×5 bitmap font and writes the value of each band into the band, in the colour that stays legible on it.
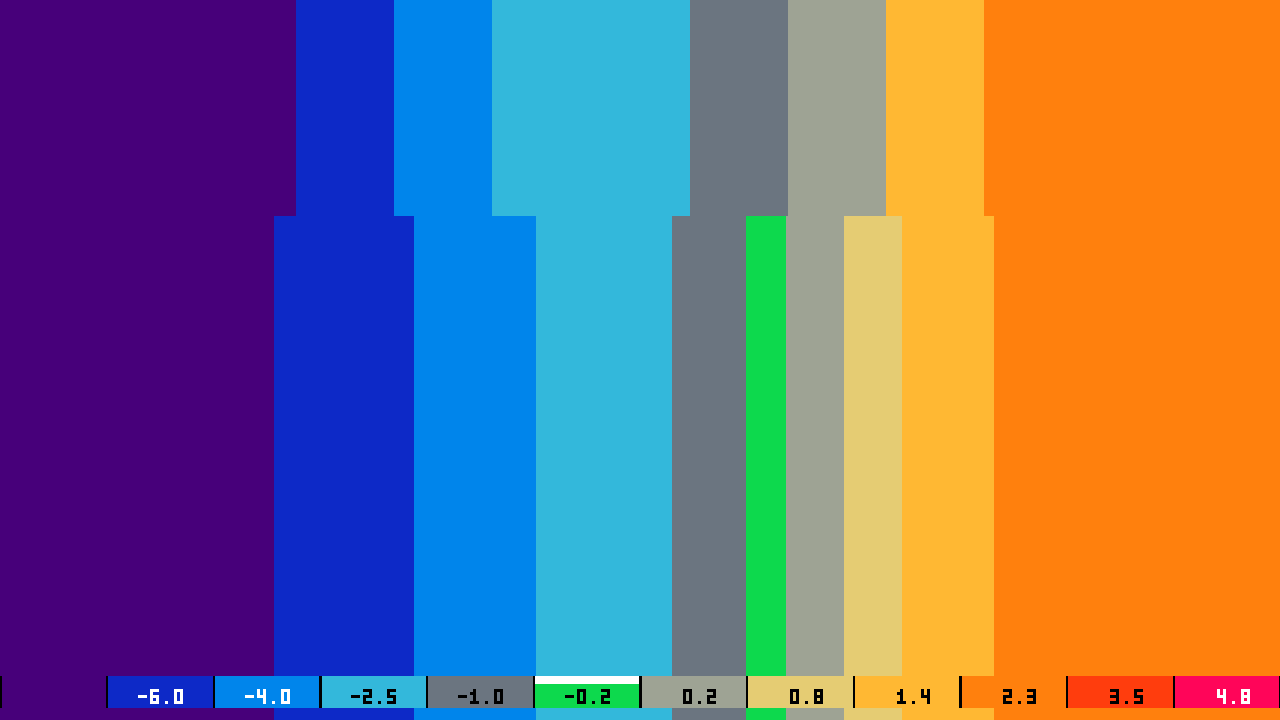
A shader cannot be handed a typeface, so the digits are hand-coded: eleven glyphs, three pixels by five, drawn from a bit mask and scaled to the height of the strip. Below about eleven pixels of strip there is nothing legible left to draw, so the numbers switch themselves off and the colour chips remain.
SCALE
Stops from middle grey, not IRE.
IRE is a number about the signal. Stops are the number you actually work in: you do not open up 6 IRE, you open up two thirds of a stop. FALSE COLOR reads in stops by default, off your own middle grey - and if you want the broadcast number, IRE is one control away.
MIDDLE GREY is yours to set
18% is the default and the convention, not a law. Rate your camera at something else, or work to a lab grey of 12.7%, and the whole scale moves with it - every band edge is defined as a distance from your grey, not as a fixed code value.
EXPOSURE OFFSET, six stops each way
Slide the whole scale up or down without touching the grade. It is how you ask what would this look like a stop and a half down and get an answer in bands, before you spend a node finding out.
The two scales agree
The IRE edges are not a second hand-picked table. They are the stop edges pushed through the Rec.709 curve, so the same exposure lands in the same band on either setting and switching between them tells you nothing new about the picture - only about the units.
Where they part, and why
The top two stop edges, +3.5 and +4.8, work out at 134 and 196 IRE. Rec.709 cannot carry either, so on the IRE scale they are pinned at 98 and 100. It is the one place the two scales are not the same scale, and it is written into the file rather than hidden.
INPUT COLOR SPACE & INPUT GAMMA
It reads the signal you hand it. So tell it what that is.
A false colour tool measures whatever arrives at its node, and a node is given a stream of numbers with no label on it. Read log footage as if it were Rec.709 and every answer on the screen is wrong — not slightly, catastrophically. Both controls ship on Rec.709 / Gamma 2.4, for a node at the end of the chain; there is no Use timeline, because Resolve never tells a DCTL what the timeline is.
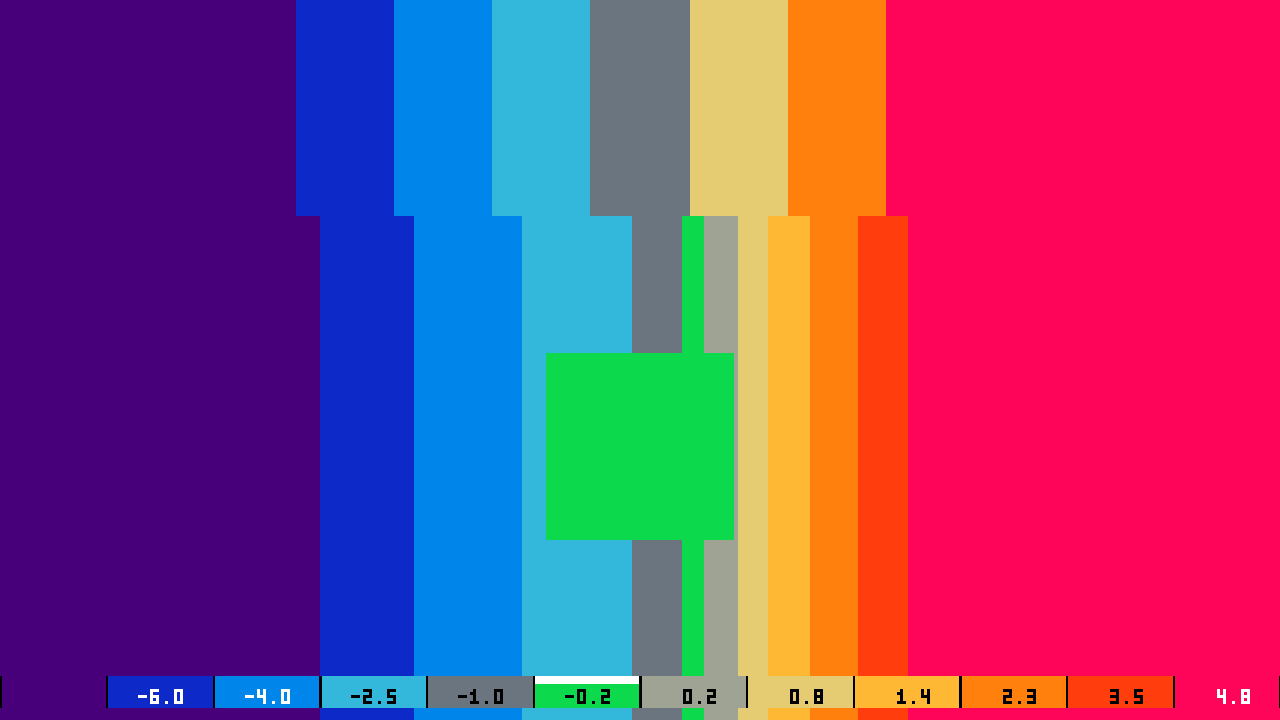
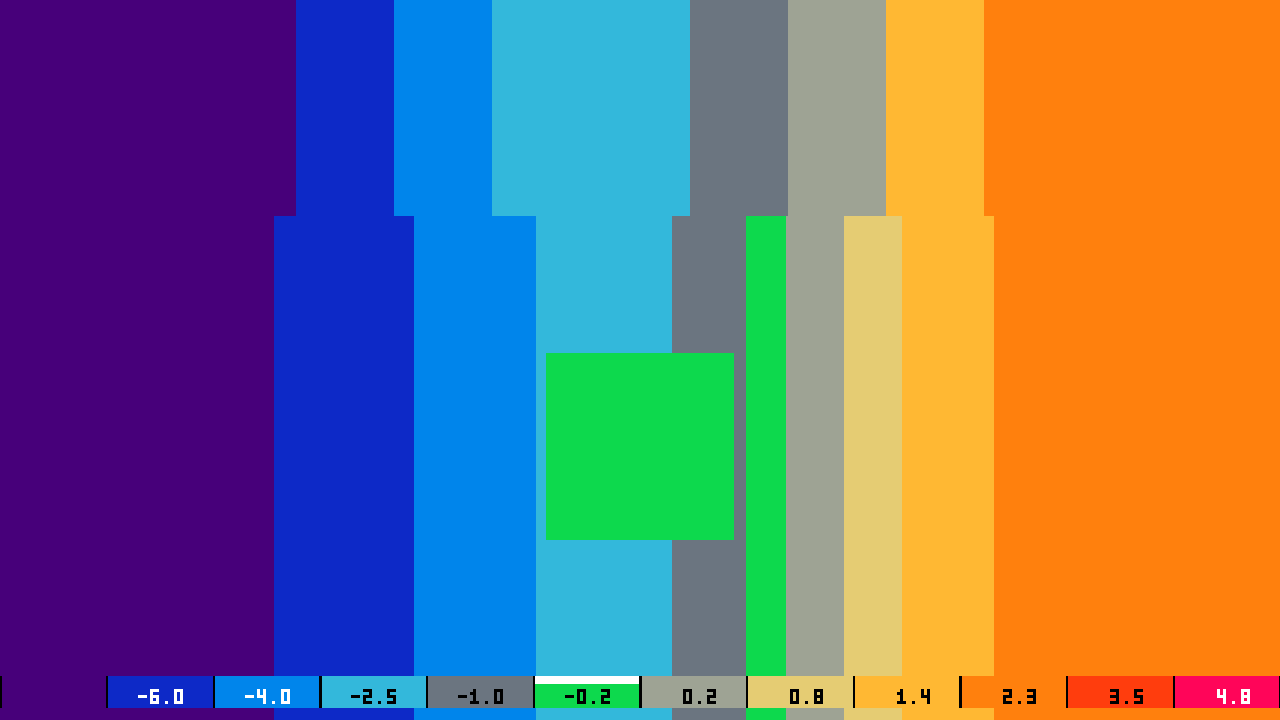
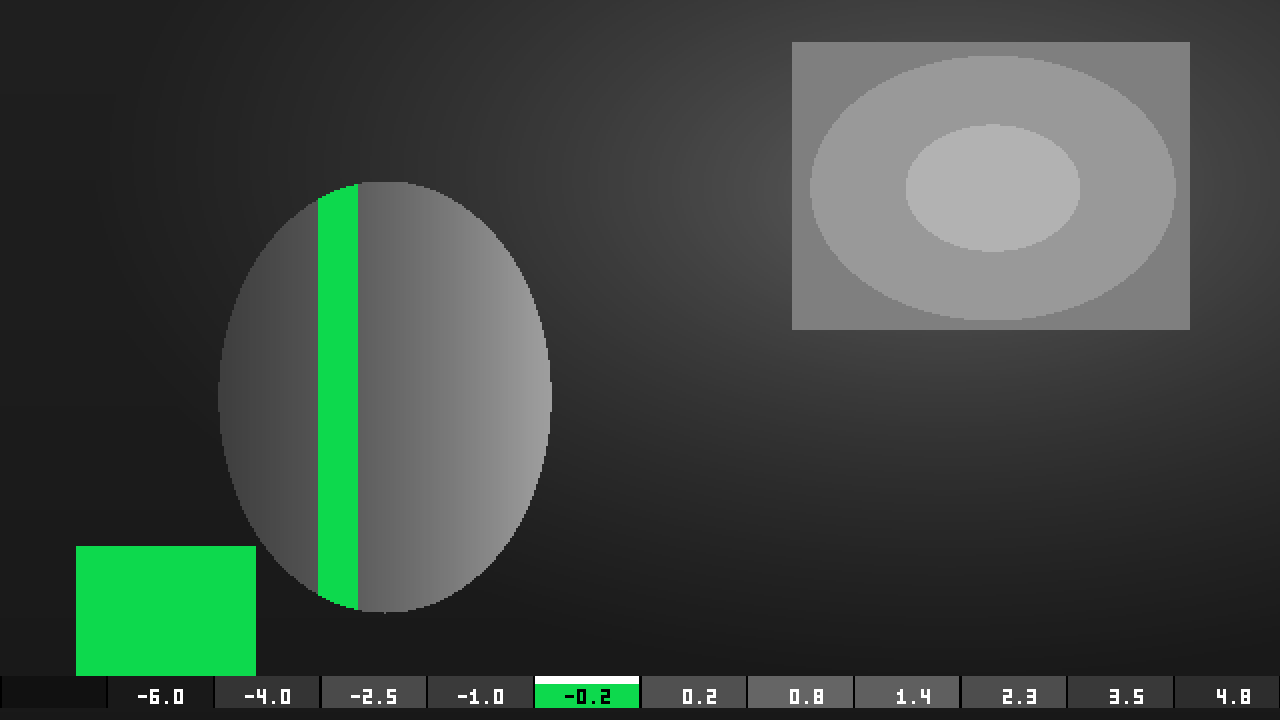
Nine curves: ARRI LogC3, ARRI LogC4, ACEScct, Blackmagic Film Gen 5, DaVinci Wide Gamut, Panasonic V-Log, RED Log3G10, Sony S-Log3, and Rec.709 / Gamma 2.4. A DCTL cannot detect which one it has been given — there is no metadata on a node, only pixels — so this is a control rather than an automatic. The tell is the picture itself: on the wrong curve a normal scene collapses toward both extremes, exactly as it does on the left.
REFERENCE PATCH
A grey card, put into the picture rather than drawn over it.
You can hold a chart up to a monitor and squint. Or the node can write a genuine 18% grey into the signal, in the curve you told it you are working in, and then measure it with exactly the same maths as everything else in the frame. It is a reference that lives inside the shot, at the same node, under the same grade.
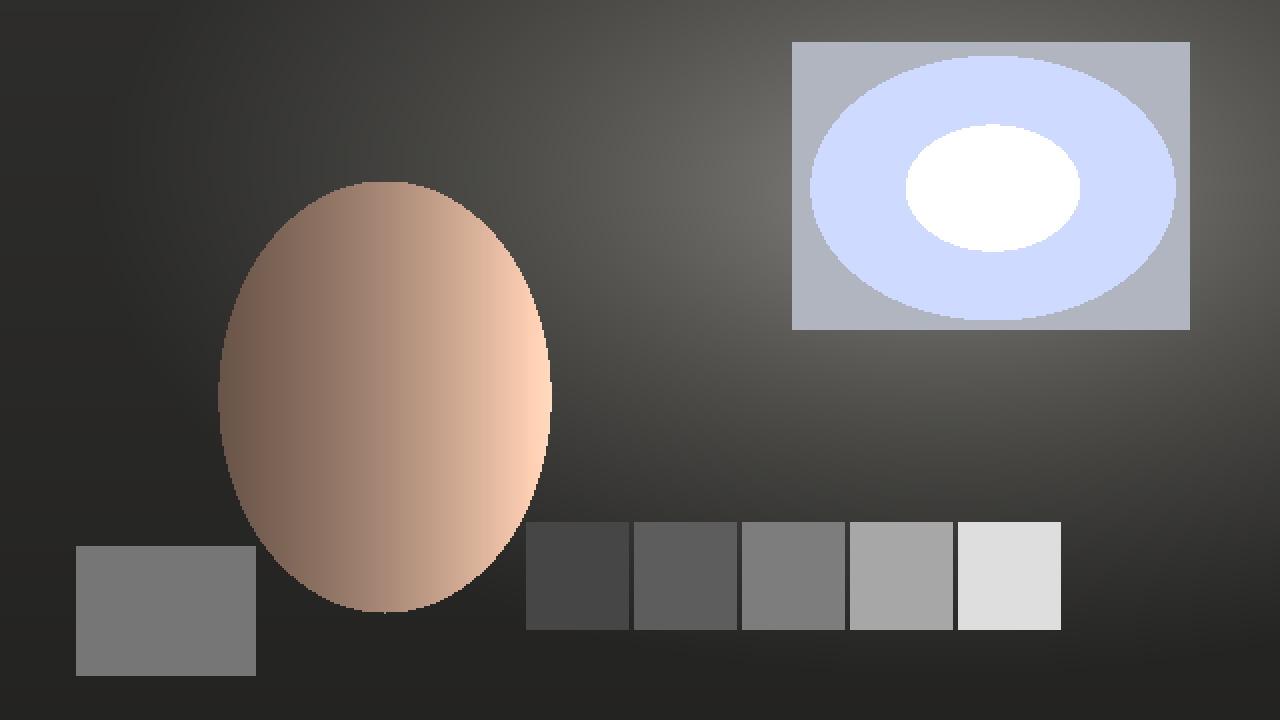
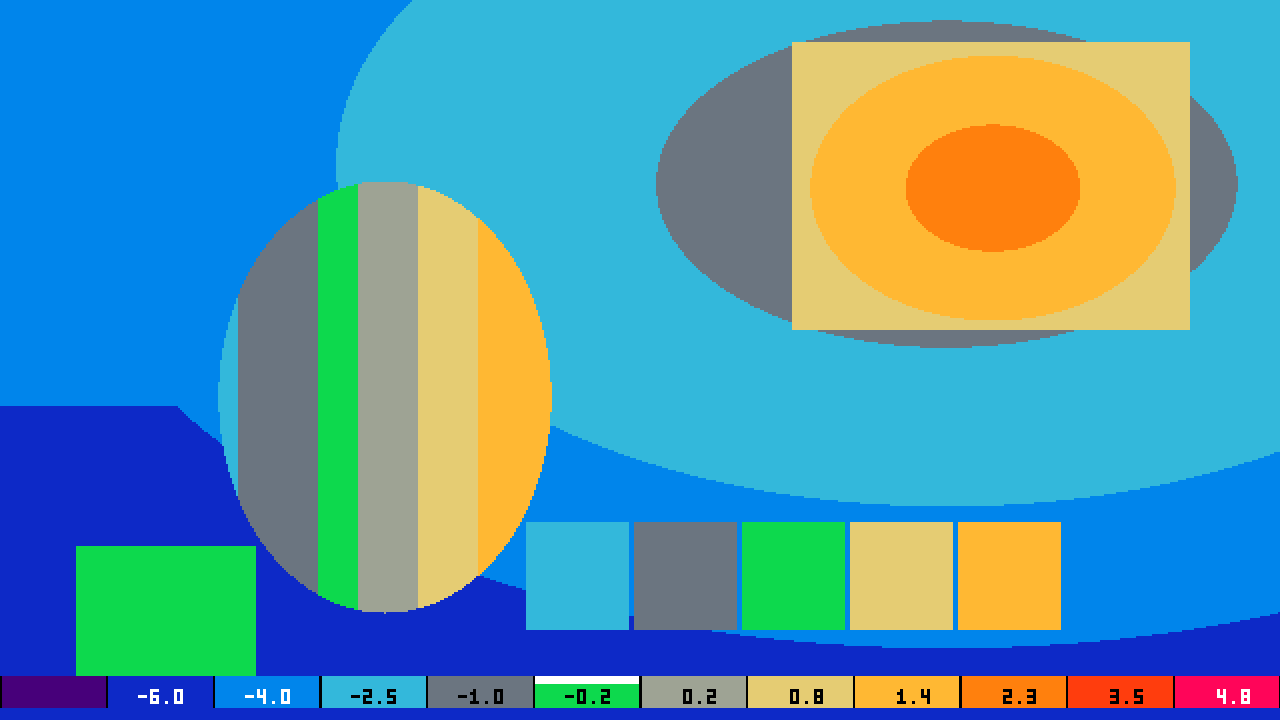
Three modes: a single patch you can size and place anywhere, the five-stop ladder above, or a surround border that puts a known grey all the way around the frame so the picture is judged against something instead of against the wall behind your monitor. What it is not is a detector for the input space: the patch is written with the same curve it is read with, so it always lands on grey. It tells you where grey sits on your scale, not whether you named the curve correctly.
The rest of it
Four controls for the four questions you actually ask.
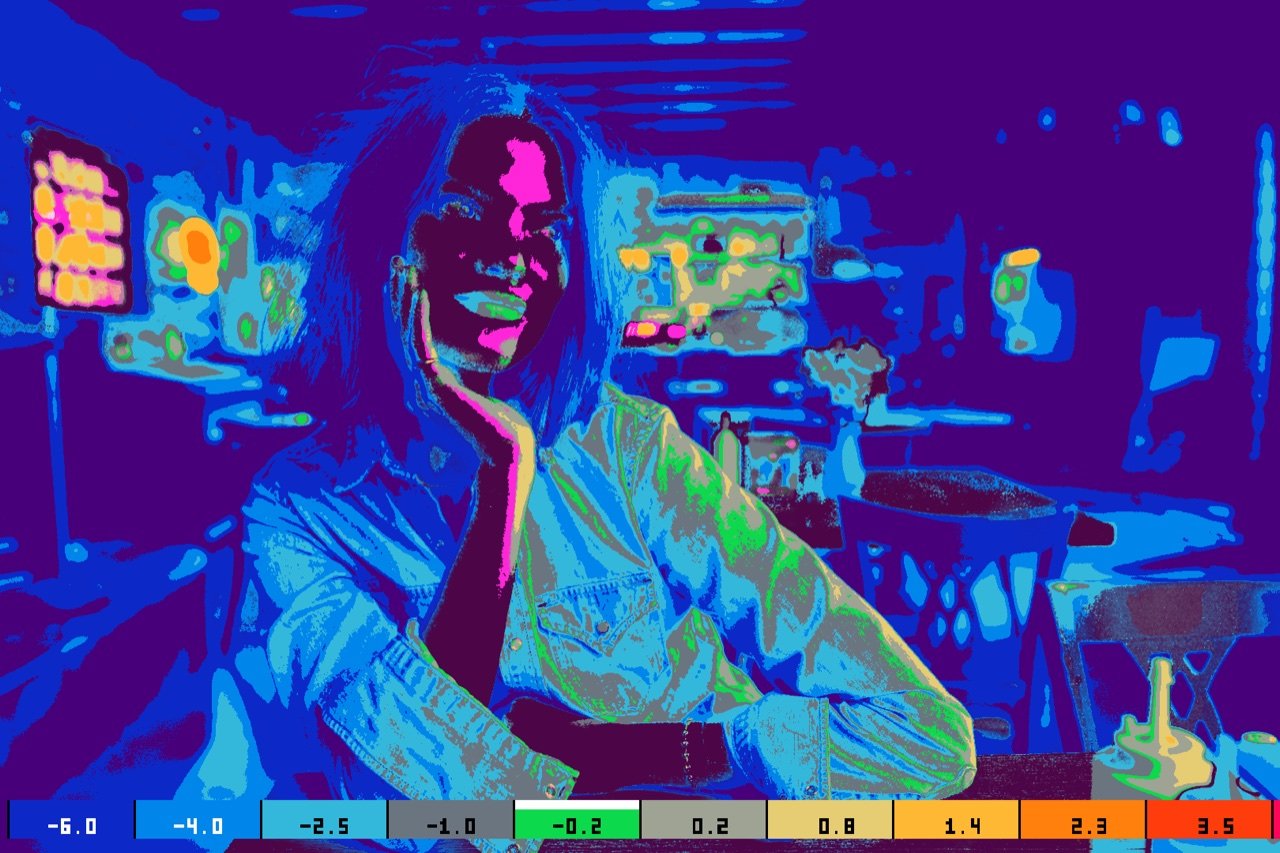
Skin guide
Where the face is, not where that level is.
Every false colour tool has a skin band. It is a band of the scale, which means a beige wall at the same exposure lights up as brightly as the face and you have to ignore it by eye.
This one asks two questions: is it at the level you named, and is it near skin hue. SKIN TARGET STOPS puts the window where you rate faces, SKIN WINDOW STOPS sets how tight it is, and SKIN HUE TOLERANCE opens or closes the hue gate for a subject the default is too strict about.
- Target and window in stops
- Gated on hue as well as level
- Tolerance you control
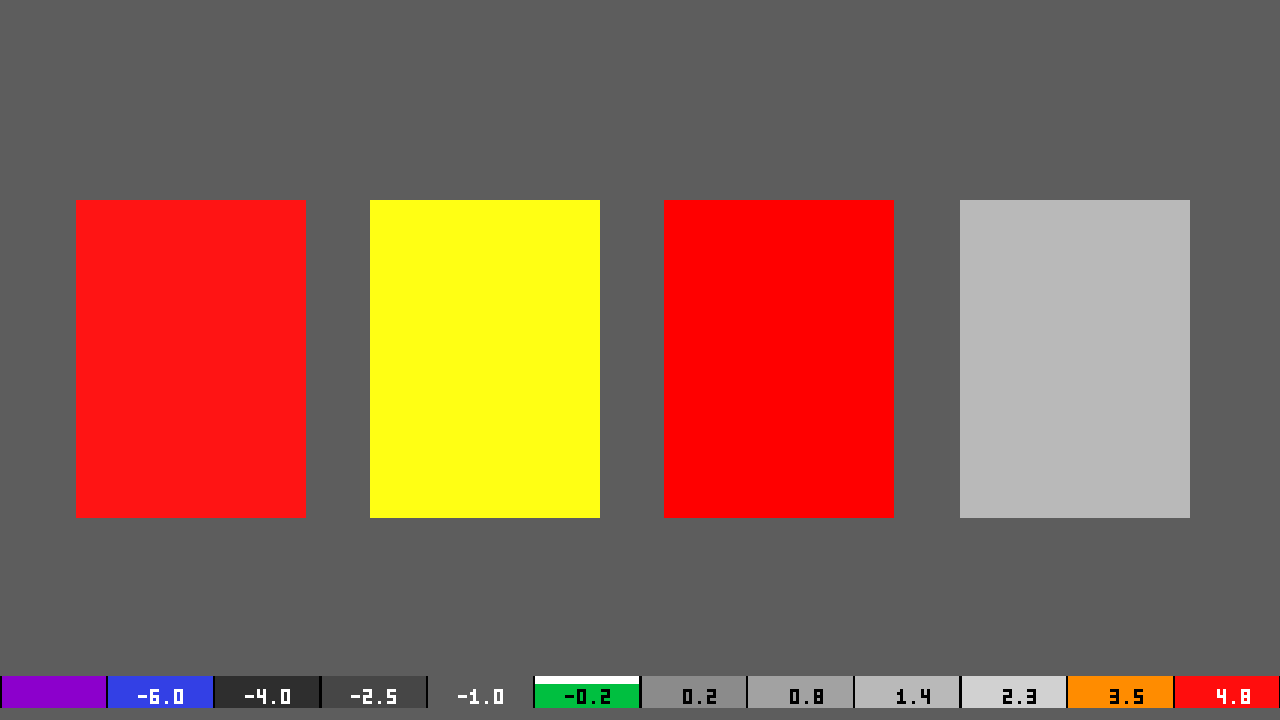
Per-channel clip
Which record went, not just that one did.
A red flower blows its red channel two stops before the picture looks blown. A luminance-only tool says nothing, because luminance is fine.
Tested on the raw signal before anything decodes it, so it is the truth about the file rather than about a curve. All three gone paints solid red; one or two gone paints the channels that survived, so you can read it at a glance. CLIP LEVEL sets where the line is.
- Per channel, not per pixel
- Tested before decode
- Threshold you set
PALETTE and ISOLATE
Four ways of painting it, and a way of painting almost none of it.
Twelve bands over the whole frame is the right answer when you are setting a key light and the wrong one when you are chasing a single value across a shot.
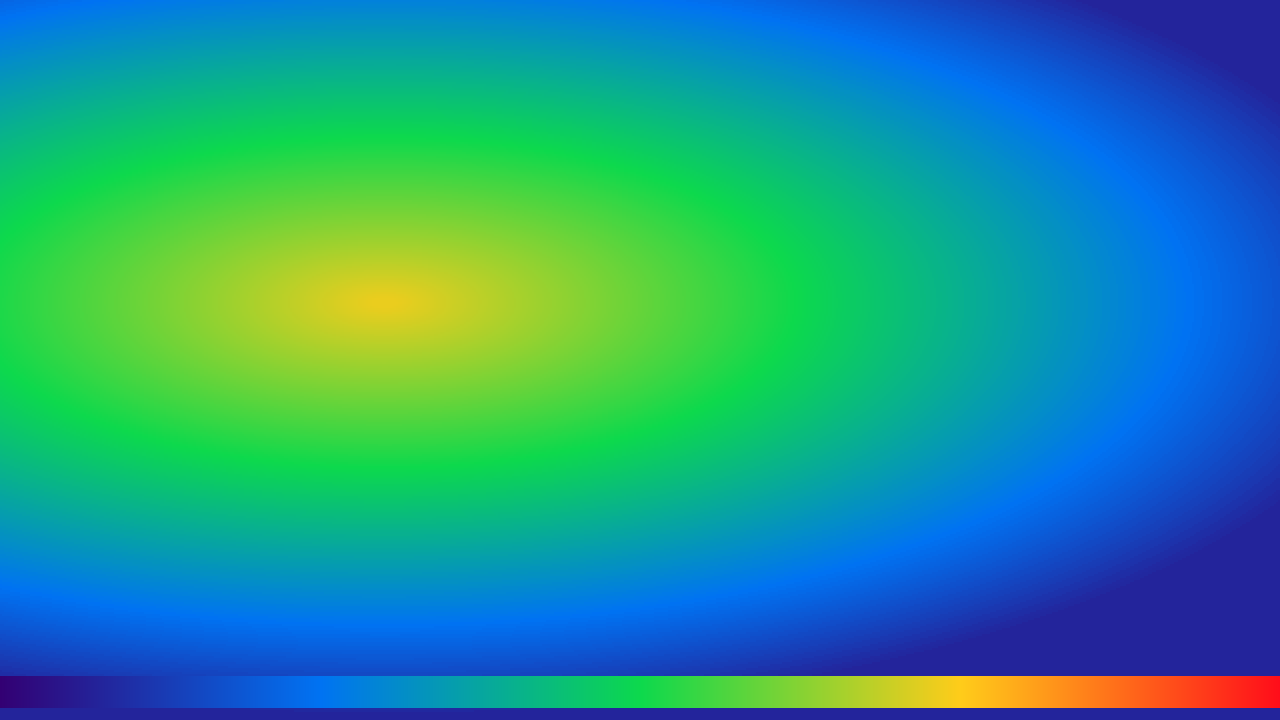
The fourth is a classic twelve-band set for anyone who already reads one. OPACITY dissolves the whole map back toward the picture at any point in between, and BYPASS returns the frame untouched, bit for bit.
Before you buy
What it will not do.
A DCTL is a shader. Resolve gives it one frame and takes one frame back, and everything below is a consequence of that. None of it is on a roadmap, because none of it is possible in the format — and a page that left it out would be selling you a different product.
It needs Resolve Studio
The free edition does not run DCTLs. Nothing we can send you changes that, so if you are on free Resolve this is not a purchase you should make today.
It cannot count pixels
A shader is handed one pixel at a time and knows nothing about any other, so there is no histogram in here, no eleven per cent of your frame is clipping, no waveform and no spot meter. Those need a pass over the whole picture, and a DCTL never gets one. The numbers on the scale are band edges - values the node already knows - not measurements of your shot.
It cannot tell what curve it is being fed
There is no metadata at a node, only pixels, so INPUT COLOR SPACE and INPUT GAMMA are controls you set rather than something the file works out. Set them wrong and every colour on screen is wrong with them. This is the single most important thing to get right, which is why they are the first controls in the list.
The grey patch is a reference, not a detector
It is written with the same curve it is measured with, so it lands on middle grey whatever the input space is set to. It tells you where grey sits on your scale and gives you something in-frame to compare against. It cannot tell you that you named the curve wrongly.
There is no second window
Resolve hands a DCTL a frame and takes a frame back. It cannot open a floating panel on your second monitor, because it cannot open anything. Send the viewer to the second display the way you already do, or run FALSE COLOR on a node and toggle it.
No camera-brand presets are claimed
The band set here is one scale, documented, with every edge written in the file in stops. It is not an emulation of any particular monitor or camera's false colour, and it would be easy and dishonest to say otherwise about numbers we have not verified against the hardware.
There is no licence key in it, which is why it is free
Resolve gives a DCTL no network, no storage and no machine id, so the file cannot check anything and nothing could ever revoke it. Rather than sell a text file on the honour system and pretend there is a lock on it, FALSE COLOR is simply free. The address is a polite ask, so we can tell you when there is a new version - the file itself sits at a plain public URL and nothing in it ever checks anything.
From download to reading exposure: about thirty seconds.
- Type your address. One email confirms it; the link in that email starts the download.
- Drop the file in. Unzip, then one .dctl into Resolve’s LUT folder — the exact path for your machine is in the email, and it is a drag and a drop. The manual rides along in the same zip.
- Add a DCTL node, set the input space. Pick FALSE COLOR in the list and tell it what is arriving at that node — its gamut and its gamma. There is no key to paste and nothing to activate.
It needs DaVinci Resolve Studio. The free edition does not run DCTLs at all — that is Blackmagic’s line, not ours, and no file we could send you gets around it.